

Salesforce Bypass Validation Rule - Setting Up Bypasses
September 21, 2020
When doing large data loads in Salesforce, one of the worst things that can happen is suddenly realizing that the data load has triggered a bunch of processes and validations in your org. Not all data loads should trigger the processes you have set up. Sometimes you just need those records to be input into Salesforce without any changes being made to them or other records. In this blog, we explain how you can bypass your automations and validation rules using standard Salesforce functionality.
Bypass Automations
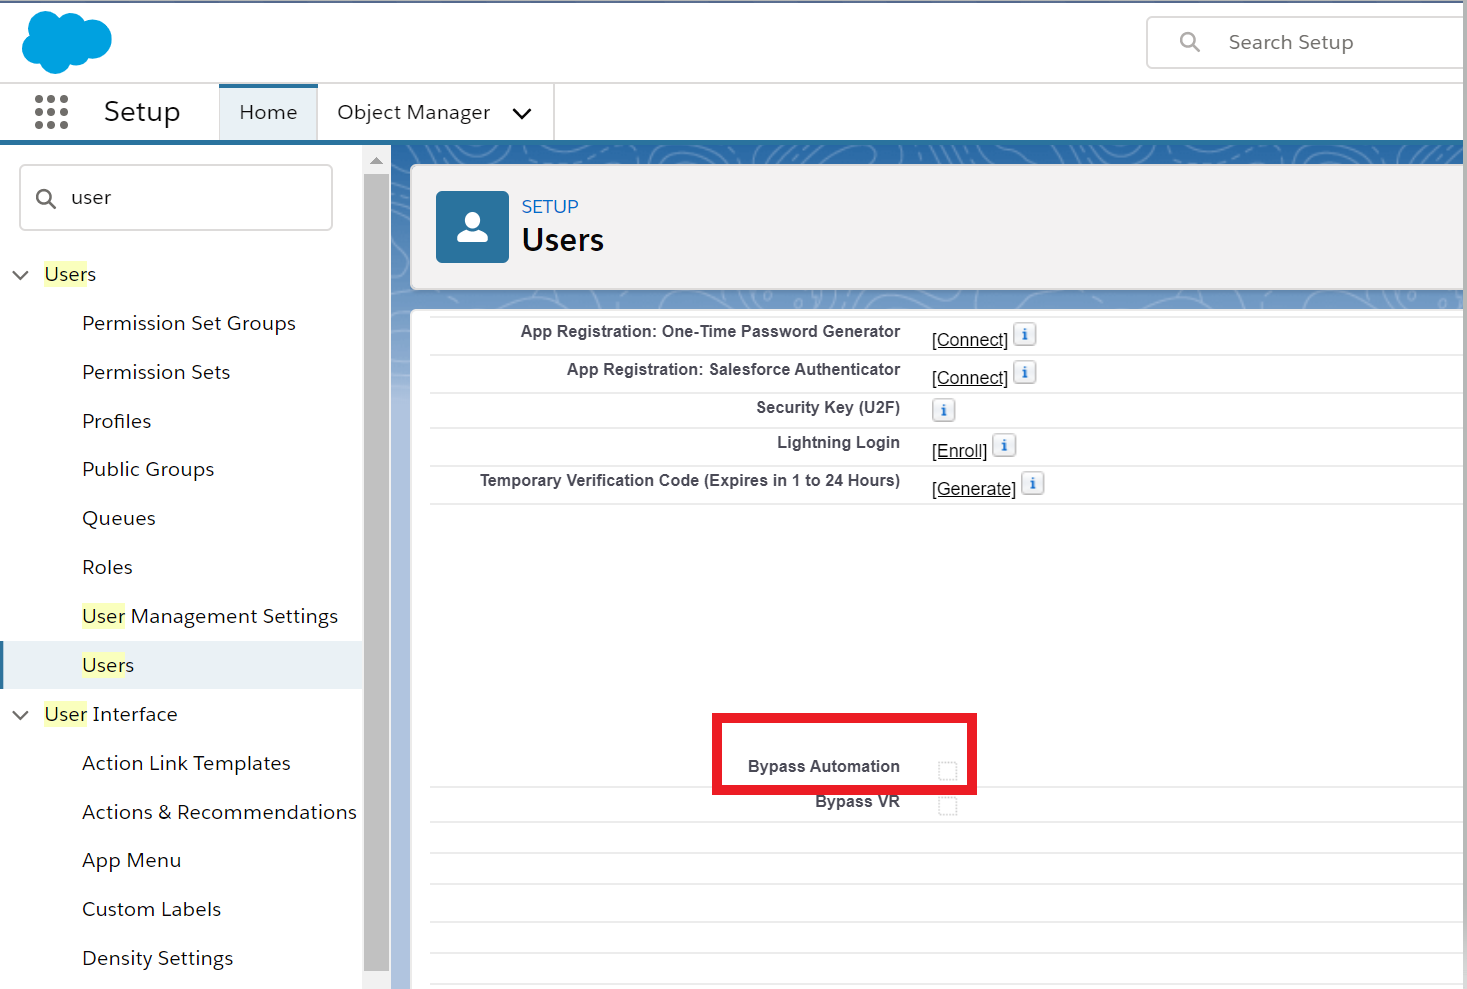
To get started, the first thing needed is a simple checkbox on your User object. You can name this checkbox “Bypass Automation”.

This field will allow you to enable or disable the bypass on a per user basis.
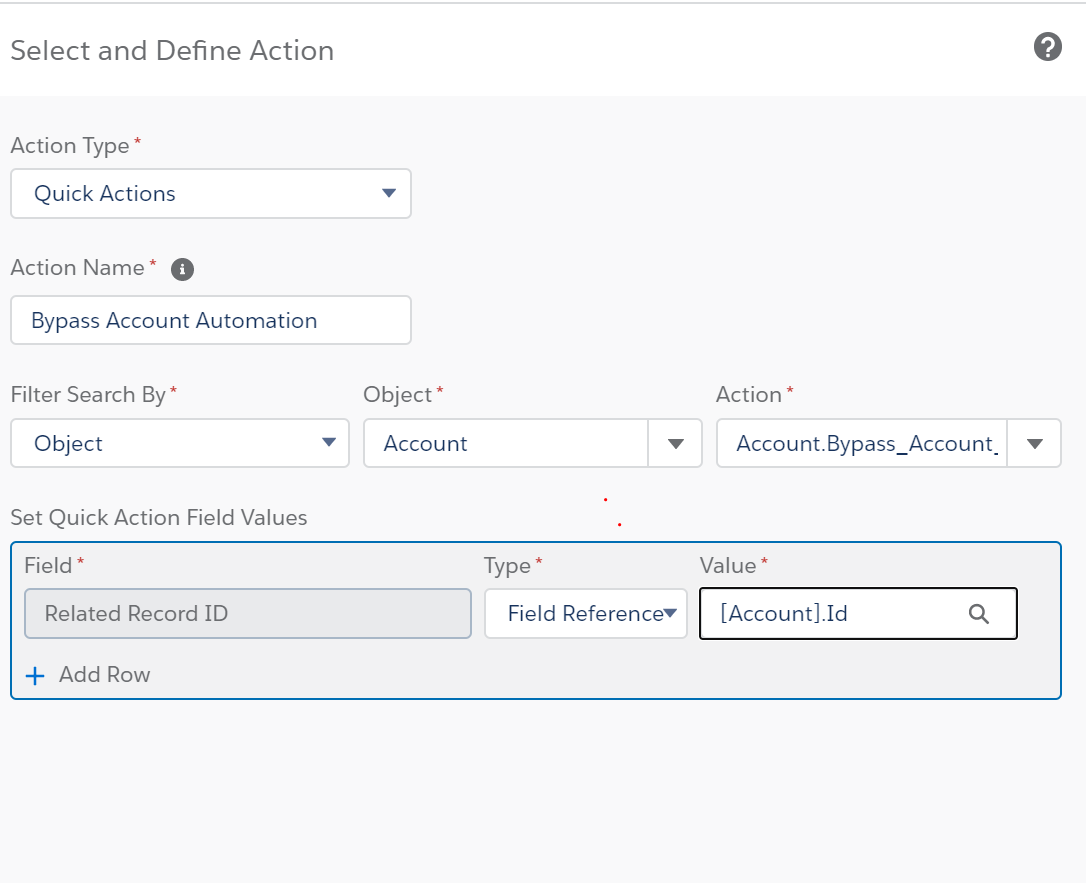
The next step is to create a quick action “update” element on the object whose automations you would like to bypass. Note that each object will need its own update quick action. For ours, we are creating the bypass on the Account object. Name it “Bypass Automation”.

On this same quick action, next click “Edit Layout”. The plan here is to remove all fields from the quick action layout. You should be left with an empty canvas. Then click Save.

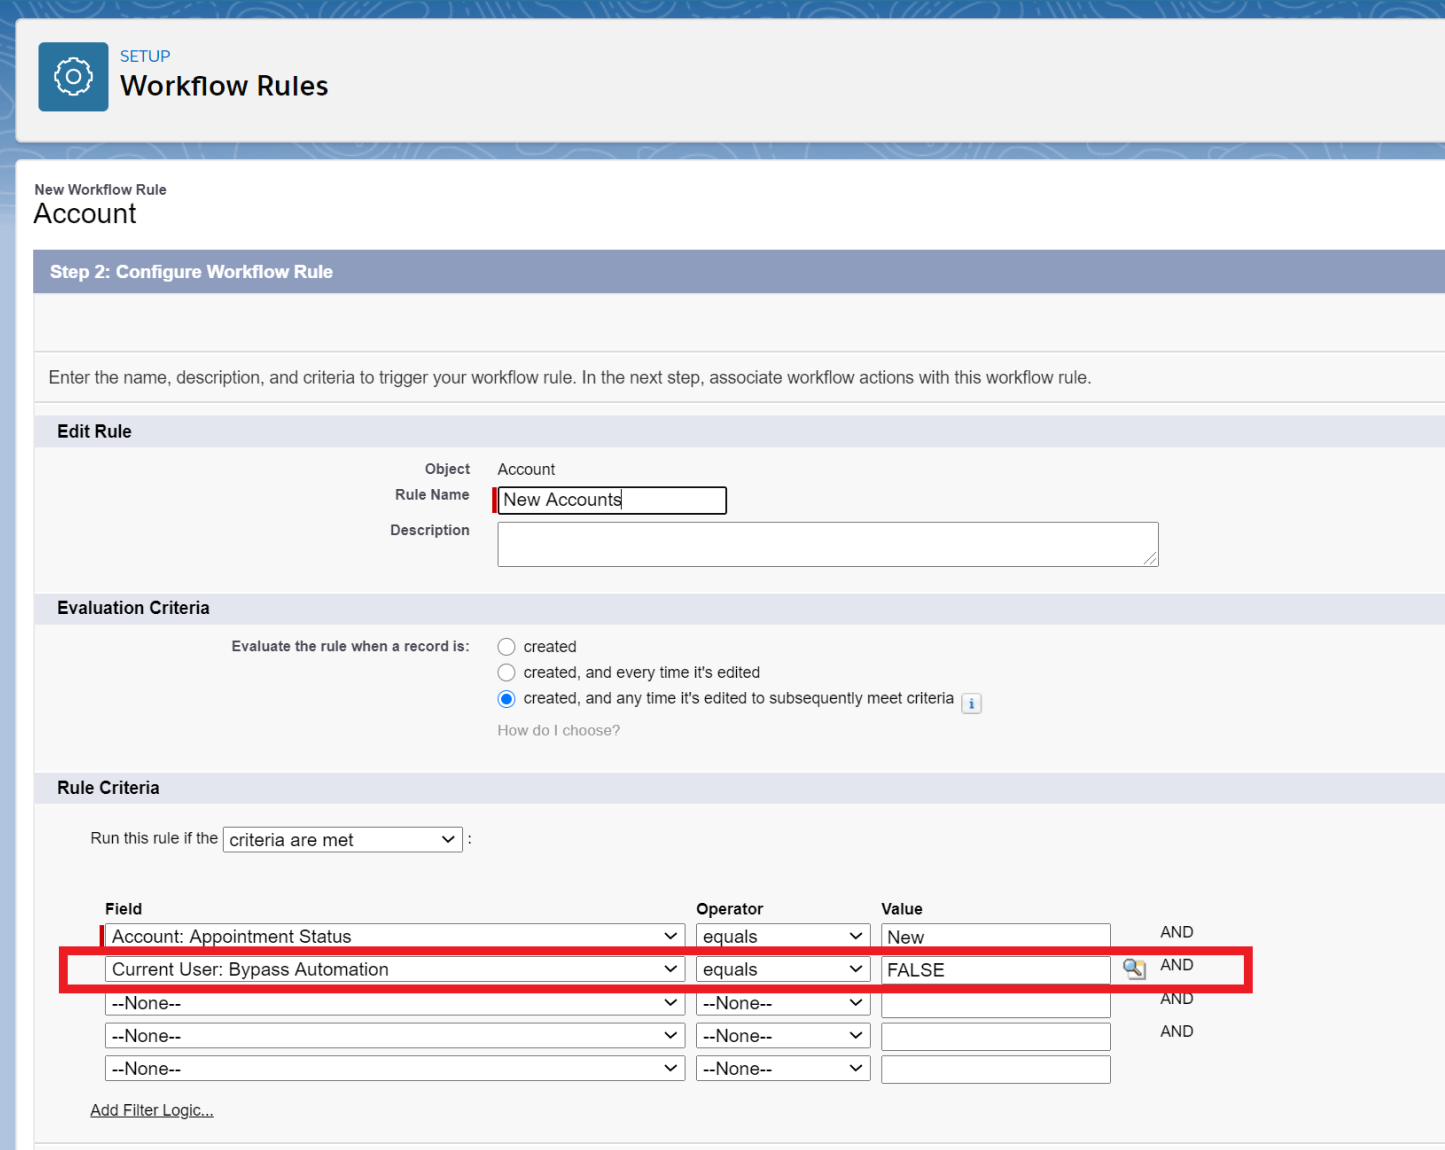
Next, in the Account Process builder, we create a new node called “Bypass Account Automation” and make sure to drag it to the first position of the process builder.
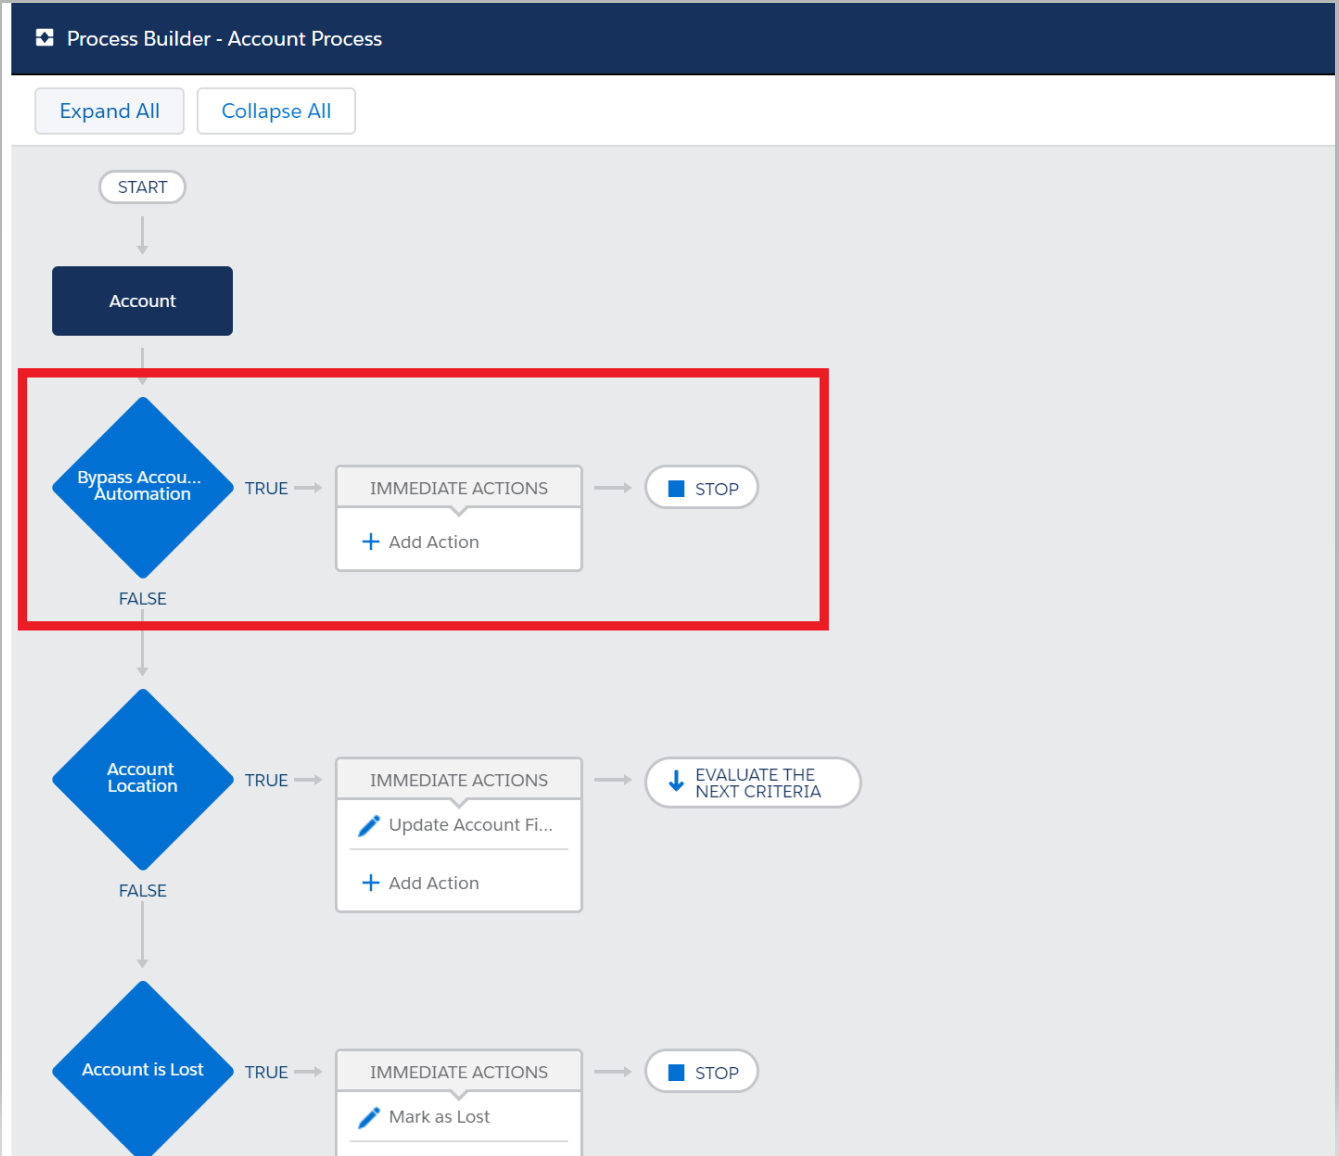
This node must also have a STOP point at the end rather than evaluating the next criteria.
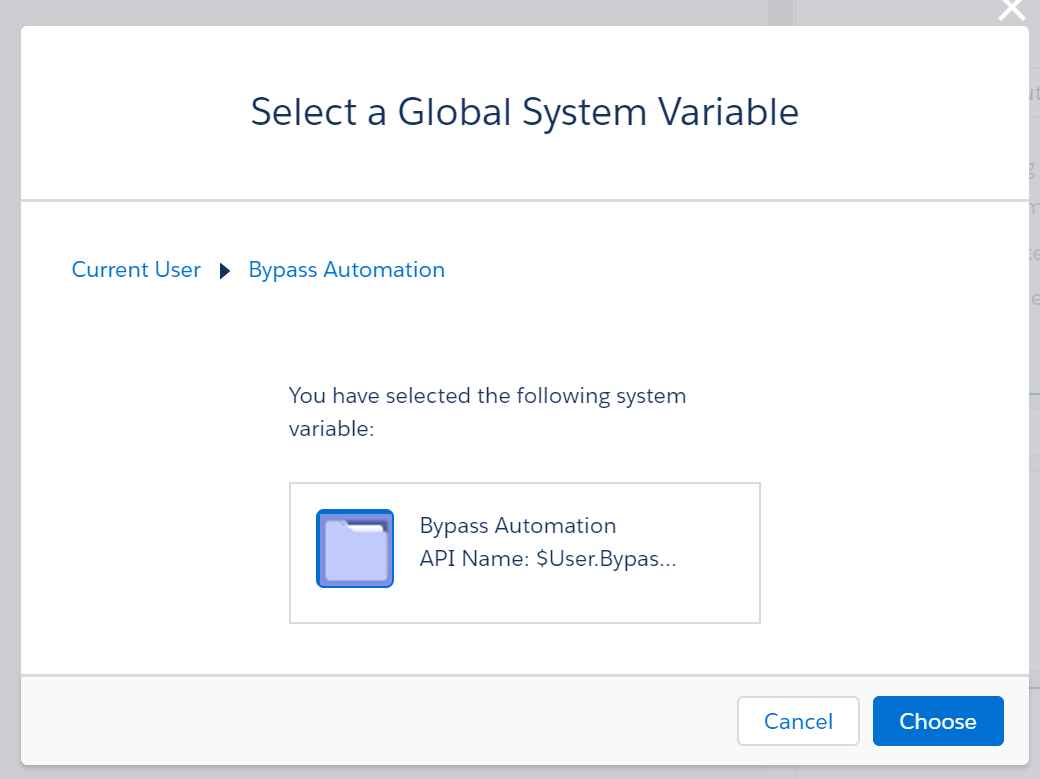
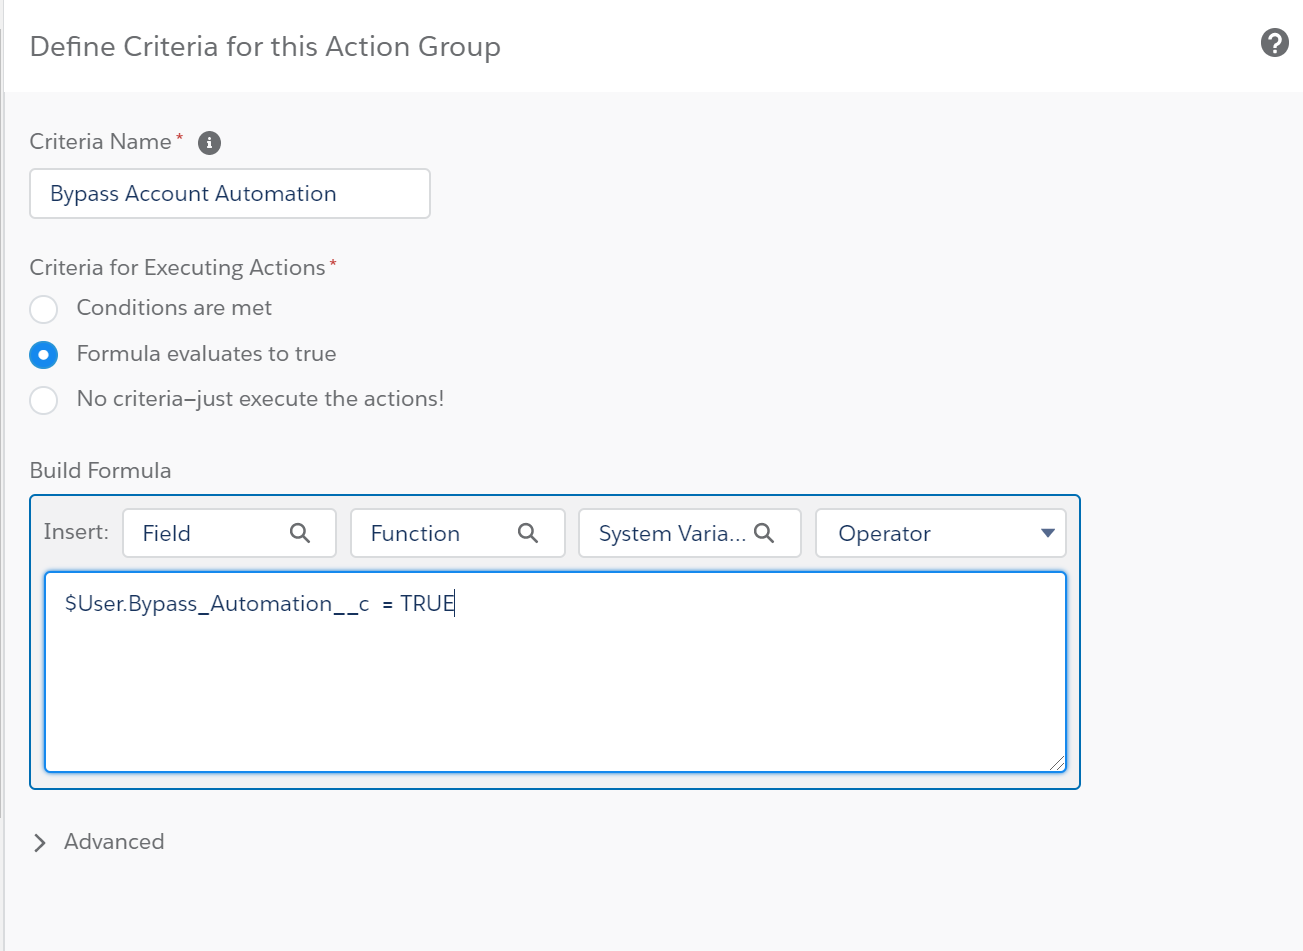
Within the criteria node, choose to evaluate a formula. The formula will evaluate the “Bypass Automation” field on the current User (the User who will be running the data load). To access this field, select “System Variables”. Then choose “Current User” and select the Bypass Automation field.
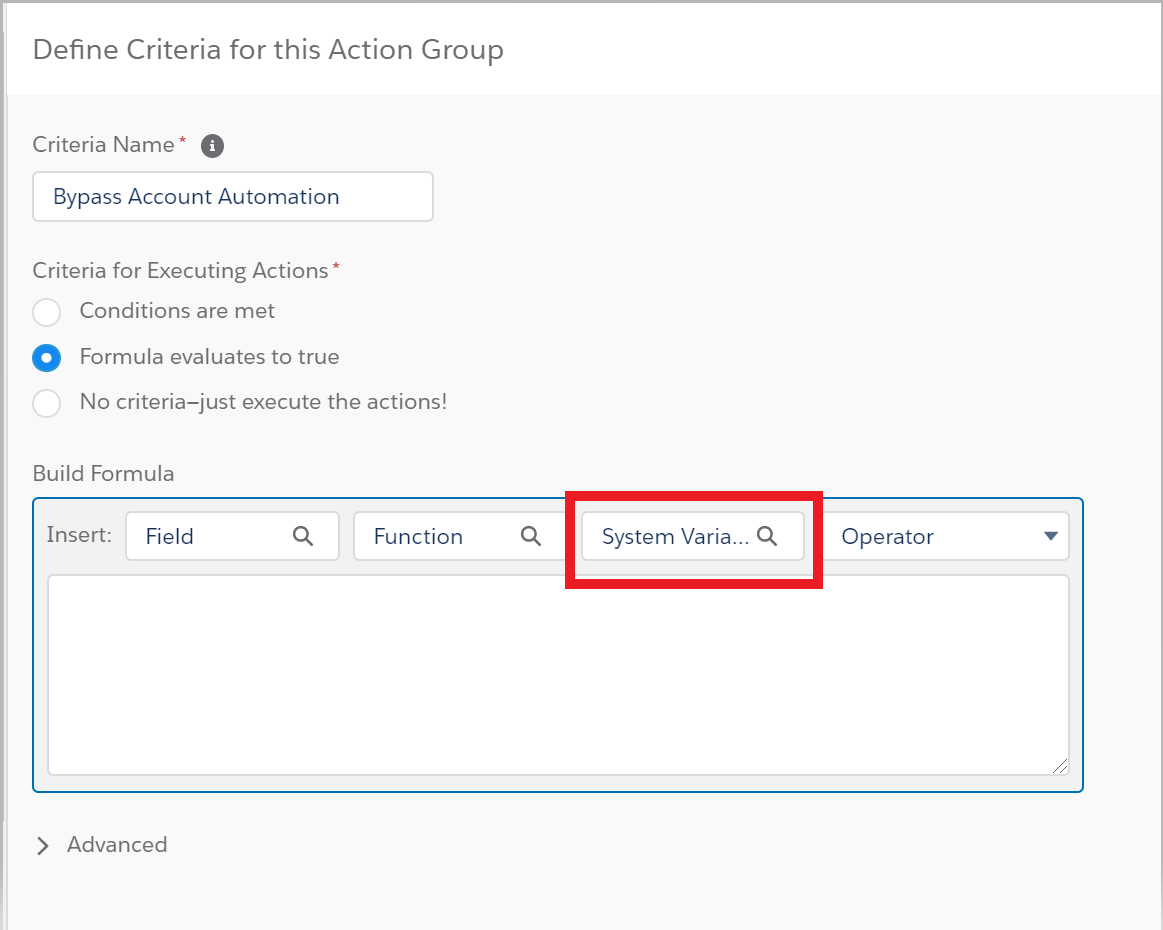
Your formula will be evaluating whether the Bypass Automation on the current user is marked True.
Now Save the criteria, and add a new immediate action. For the Type of action, selection Quick Action. In FIlter Search By, select Object, then choose the Account object. For the action, select the bypass quick action that was earlier created on your object. And lastly, for the Related Record ID value, choose the id field of the object you are bypassing.
Now save your action and activate your process builder. The process builder will now stop at this first node whenever the current user has the “Bypass Automation” field checked on their User record. The process builder will enter this first node and execute the quick action update, but since there are no fields on that quick action’s layout, there will be nothing to update. The process will then stop after this node, avoiding any further actions being triggered.
Add the “Bypass Automation” field to any workflows that run on your object as well. For workflows, you want them to run only when the “Bypass Automation” field on the Current User is FALSE.
Be sure to uncheck the Bypass Automation field on your User record once all data updates are complete to avoid any inactive processes from your User not triggering automations.
Bypass Validation Rules
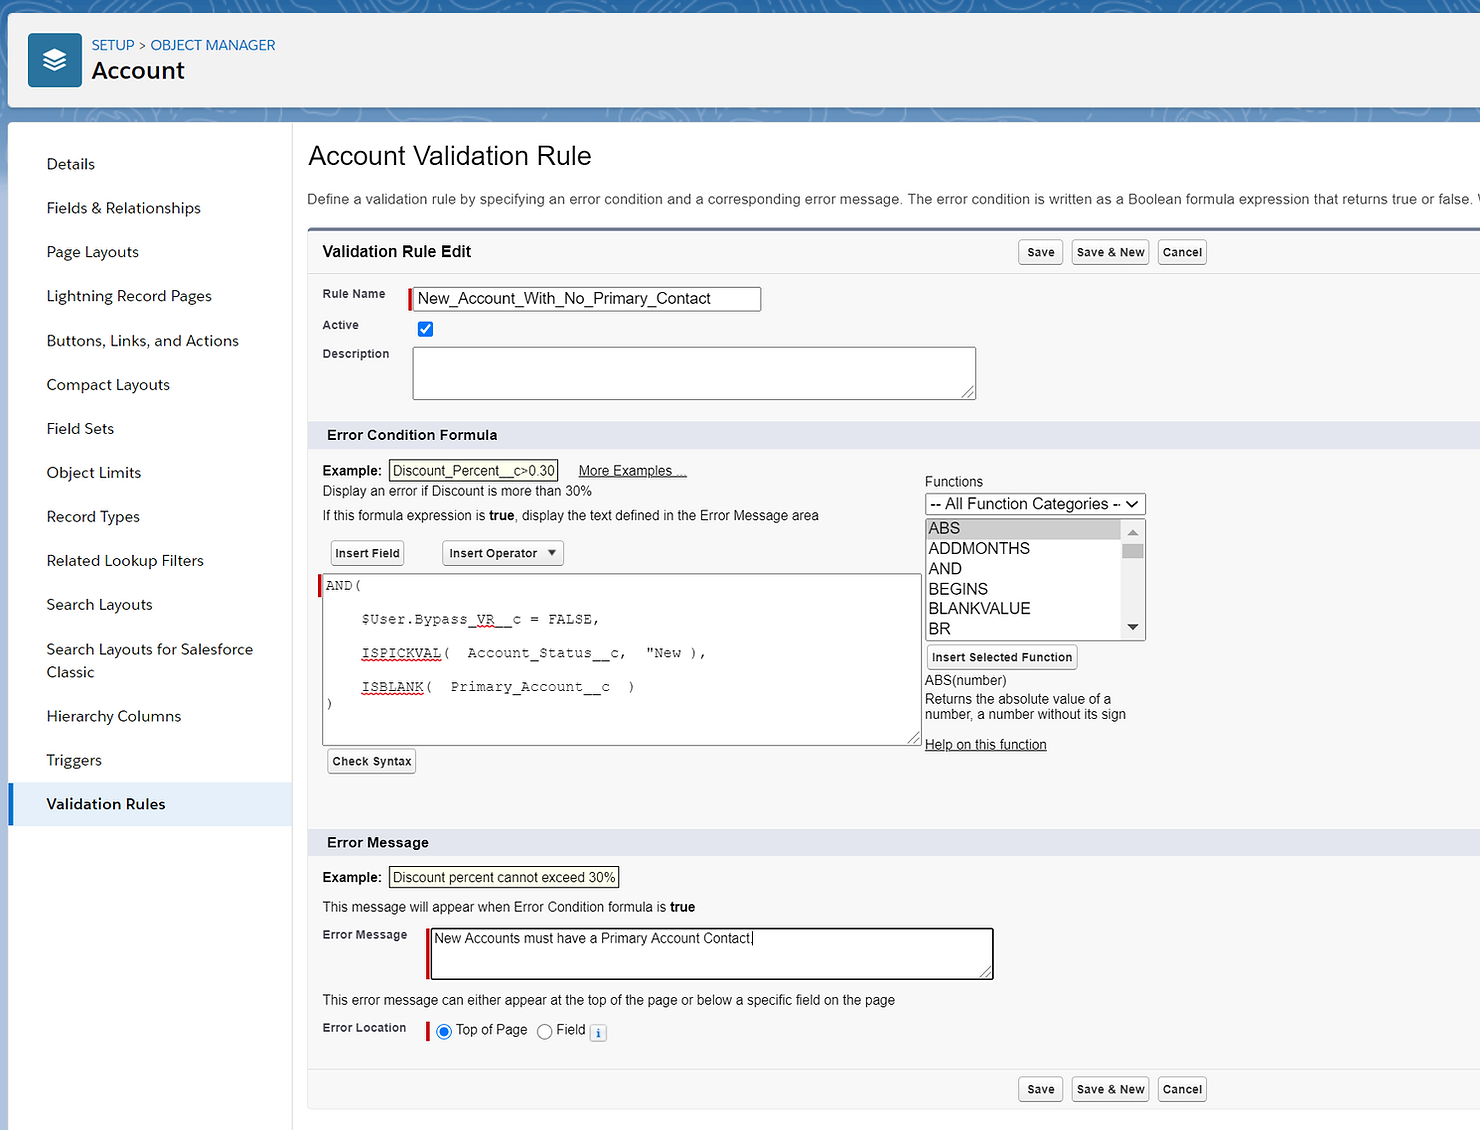
To set up a Validation Rule bypass, the process also starts by creating a new field on your User object. This field is a checkbox and can be named “Bypass VR”.
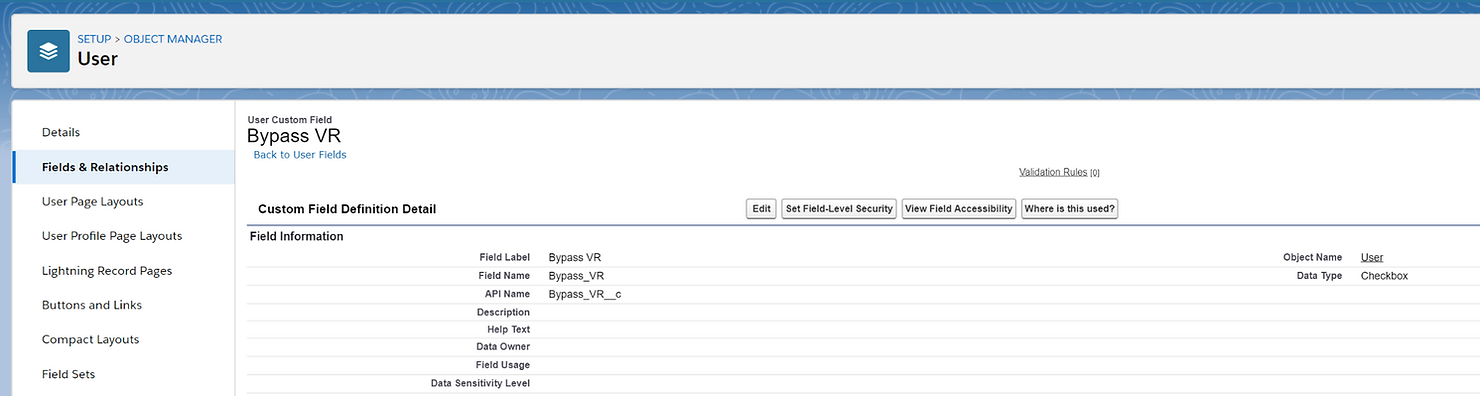
This value must then be entered on all validation rules for all objects.
On your validation rule setup page, and an “AND()” function (if your rule doesn't already have one) and within that function you will add the API name for the bypass field.
Click on “Insert Field” and scroll until you find the “Current User” selection. From there, click on the “Bypass VR” field. The field will now show in your validation rule.
The validation should trigger when the field is FALSE. This tells the validation that if it is not set to false, then it should not run.
Now you can data load, test new processes, and do any other configurations without worrying about validation rules or automations firing over and over and slowing down your process!
