

How to Set Up Salesforce DLRS Activity Rollups
August 31, 2020

Declarative Lookup Rollup Summaries, or DLRS, are perfect for creating rollup fields for objects that are not related through a master detail relationship. DLRS allow for calculations between any parent and child objects and they have a variety of calculations such as rolling up the most recent or least recent records, giving total counts, giving the sum of a child record’s numeric fields, or even concatenating child field values onto the parent record. You can also add criteria to further filter which records should be evaluated in the rollup.
Start Creating DLRS Rollups
To get started, first make sure you have the DLRS package installed in your org. You can install it by clicking here.
Once installed, you are ready to start creating your rollups.
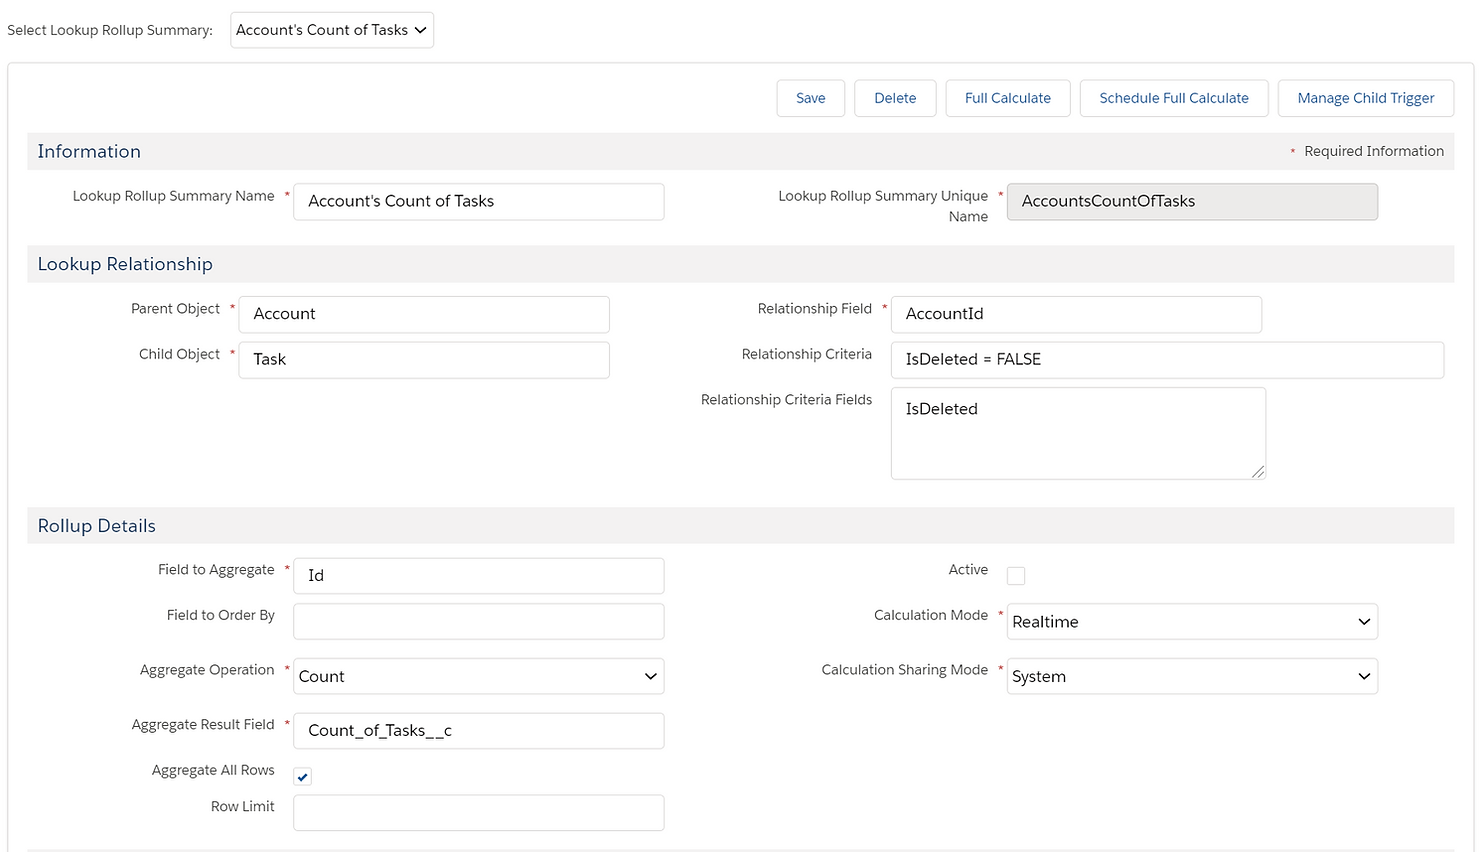
Here we will go over creating a rollup on the Account record to show its total number of Task records.
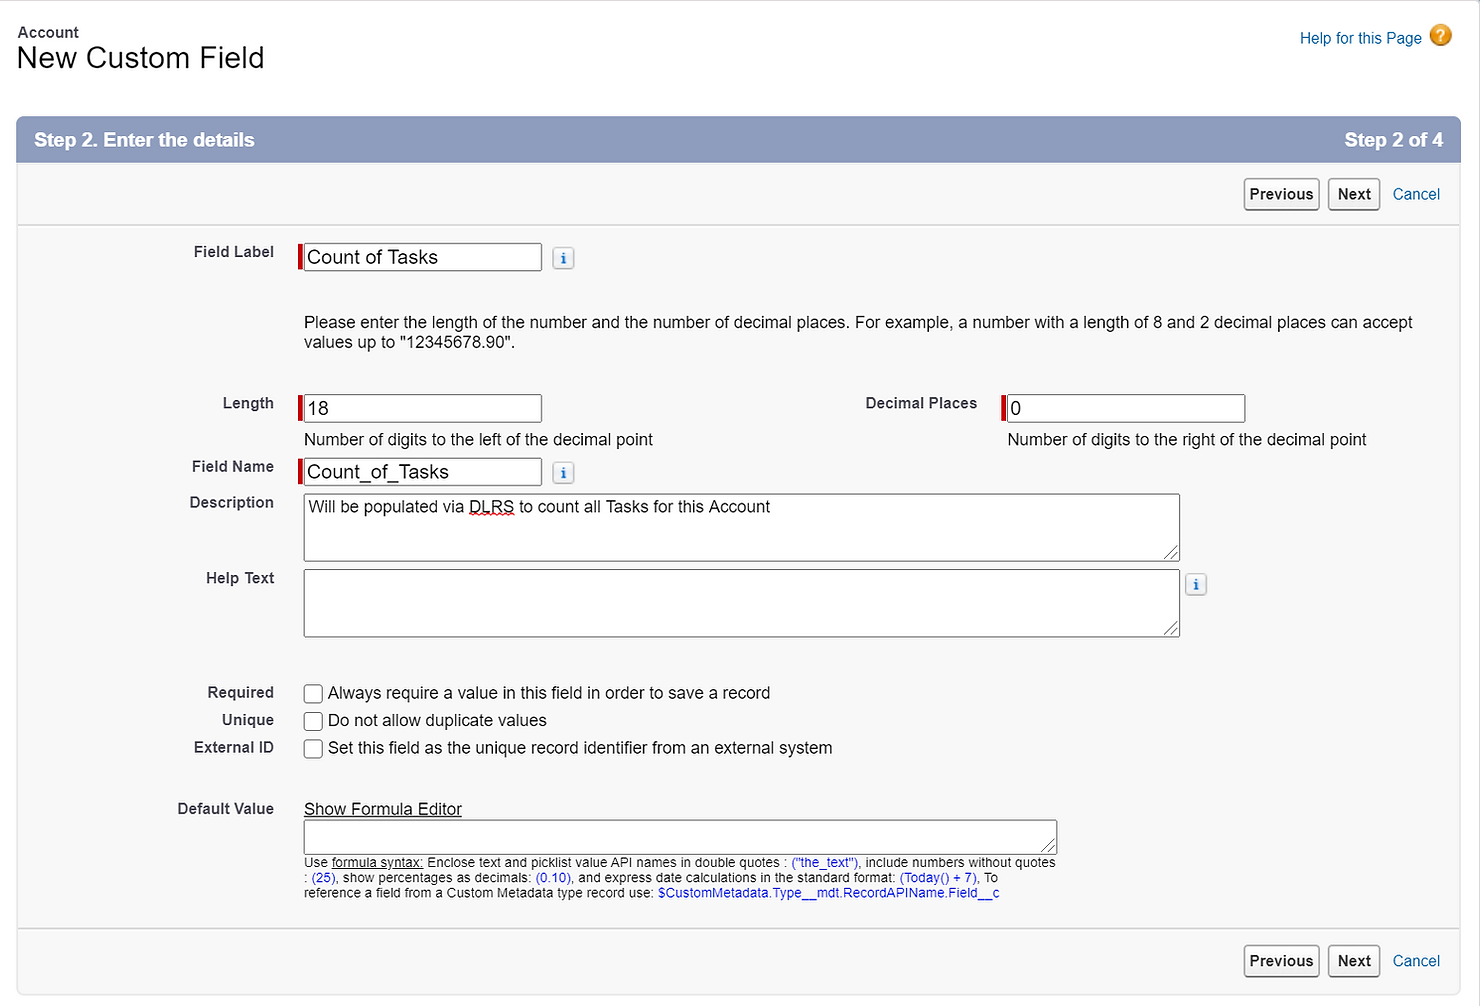
First, create a number field on the Account that will hold the rolled up value. We named ours “Count of Tasks”. Then, take note of its API name, or better yet copy it to your clipboard for use later.
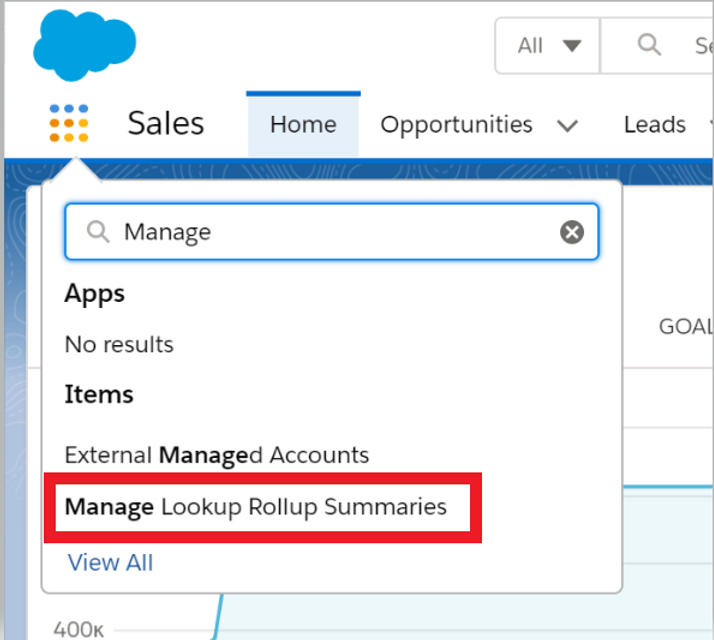
Then, from the app launcher, you can easily find the DLRS manager by typing “Manage Lookup Rollup Summaries” into the search bar and you will be directed to the rollup creation screen.
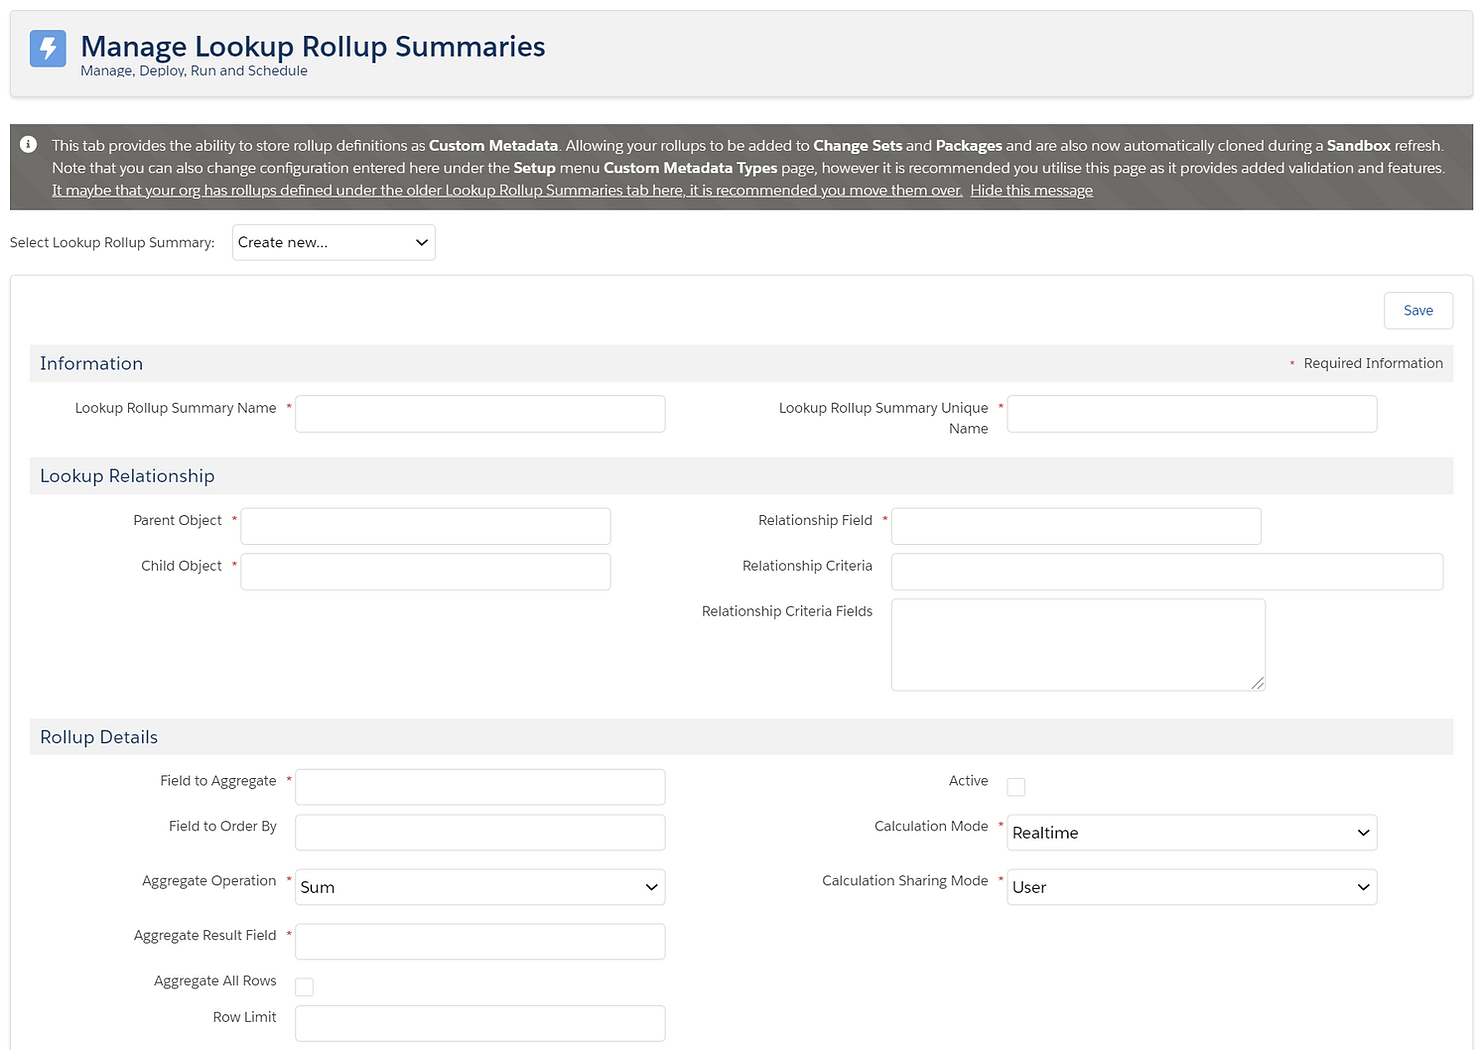
For your setup, you will have something similar to the below screenshot:
DLRS Fields to Fill In
The fields to fill in are:
- Lookup Rollup Summary Name - Since the DLRS interface doesn’t group your rollups by object, it can quickly become confusing as your list grows. It is helpful to label each rollup with the object name followed by the rollup field name.
- Lookup Rollup Summary Unique Name - This is the API name for your rollup. It does not auto populate so you will manually have to fill it in.
- Parent Object - The API name of the object containing the rollup field.
- Child Object - The API name of the object whose values are being rolled up.
- Relationship Field - The API name of the lookup field on the child object that relates it to the parent object.
- Relationship Criteria - This field is where you enter your criteria using field API names and the conditions that will be used with them. This field uses SOQL formatting so your criteria string must be formatted like that. An example of how this might look is:
( IsDeleted = FALSE AND Type = ‘Call’ ) OR (IsDeleted = FALSE AND Type = ‘Email’ )
Here, the rollup will count any undeleted Task records with a Type field value of Call, or it will count any undeleted Task records with a Type field value of Email.
7. Relationship Criteria Fields - Here you only enter the API names for any of the fields used in the Relationship Criteria text box above it. Enter each different API name on a new line.
8. Field to Aggregate - The field that you would like to roll up onto the parent object. If you are doing a Count operation, you can roll up the Id field of the child records.
9. Field to Order By - Use this field only when the order of your child records will impact the roll up data. For example, if you are rolling up the date of the most recent Task record, you would want the Tasks to be ordered by either Created Date or Activity Date. Then, along with the “Last” aggregate operation, the rollup will calculate which Task record was last created based on the date value that is being ordered by.
10. Aggregate Operation - This is where you choose the type of rollup that will be created. The options to select from are:
- Sum
- Max
- Min
- Avg
- Count
- Count Distinct
- Concatenate
- Concatenate Distinct
- First
- Last
11. Aggregate All Rows - This option determines whether or not archived or deleted records will be counted in your rollup. Since Activities in Salesforce can become archived after a while, we usually check this box when rolling up any Task or Event records. Then, to ensure that we do not count any deleted records, we use the “IsDeleted = FALSE” criteria.
12. Row Limit - This allows you to set a limit for how many child records will be evaluated for your rollup.
13. Active - This box determines whether your rollup is currently running or if it is inactive. When creating a DLRS on a child object for the first time, before you can save it as Active, you must first save the inactive version, then click the “Manage Child Trigger” button so that you can deploy the underlying code. Then you can save your rollup as active and allow it to run in your org.
14. Calculation Mode - This option determines how and when your rollup should run.
- Realtime will run on any creation of update of the child object records.
- Scheduled allows you to set exactly when the rollup should calculate.
- Developer allows the rollup to be called from custom triggers.
- Process Builder allows the rollup to be called from a process.
For our rollup, we will use Realtime so that the rollup will update for any new Task records added to the account, with no further configurations needed.
15. Calculation Sharing Mode - This determines whether Salesforce sharing configurations should be taken into account when the rollup calculates. “User” mode will calculate only records the current user, who triggered the rollup calculation, can see. “System” will calculate all records regardless of the current user’s access to them.
Now that your DLRS is filled in with the necessary values, click the Save button. If this is your first rollup for the child object, you cannot yet save the DLRS with the “Active” checkbox checked. Save it with the “Active” box unchecked.

Once Saved, then click the “Manage Child Trigger” button.
Here, you will see the actual code for your rollup. Don’t mind any of the code, just scroll all the way to the bottom of the page and click the “Deploy” button.
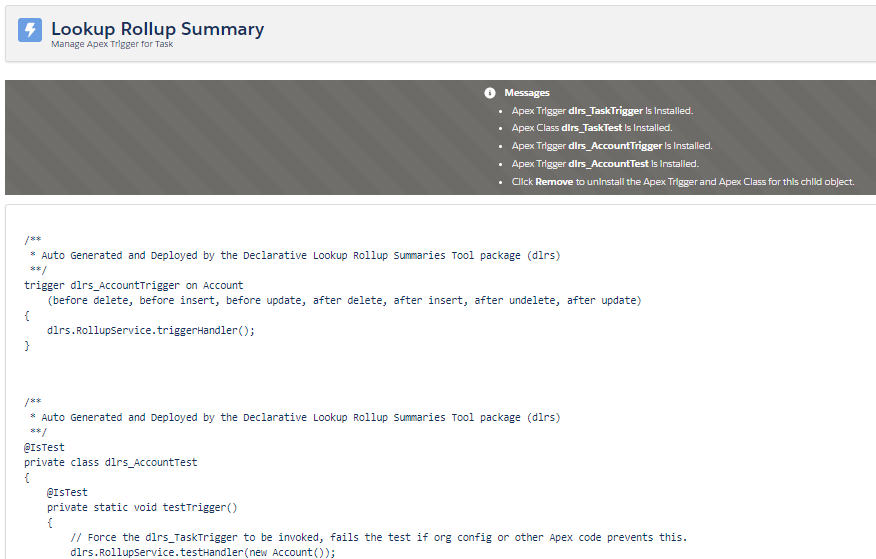
The code can take a minute or two to deploy. Once it finishes, go back to your rollup set up page, click “Active”, and then click the Save button. Your rollup is now active and ready to calculate the count of Tasks on your Accounts!
Note: If you ever notice that your rollup has not calculated, you can manually trigger it by clicking the “Full Calculate” button.
